Dial Movement Controls
Toward the left side of the Display window and to the right of the Switches is a small control area below the Search button for setting how the Dial Pointer is moved, adding rings and changing Dials.
At the top is a Button labeled 90° Dial when the 360° Dial is displayed or 360° Dial when the 90° is displayed. This toggle switches the Dial being displayed at any given time between the 360° Dial and the 90° Dial. When switching Dials, nothing is changed except the harmonic layout and Dial style. All added points and formulas will remain, as will any added rings or dynamic overlays like transits, progressions, etc. By toggling between the two Dials, you can identify material in the 360° and examine it more closely using the 90° Dial.
Below the Dial Toggle button is a drop down window (with a down arrow to the right side of the window to drop down the menu). This drop-down window is the Dial Pointer Function Control window and works in tandem with Dial Pointer Movement selection drop-down window, below and above the Up and Down arrows (or the mouse wheel if you have one).
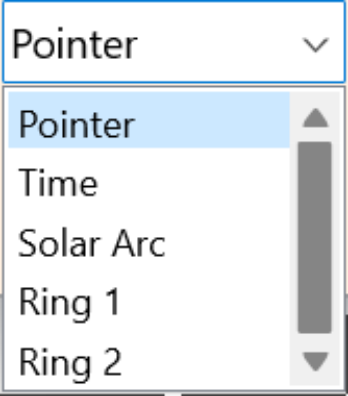
The Dial Pointer Function window allows you to select how the 2 Up and Down arrows, below, move either the Dial Pointer or the dynamic material displayed on the Dial.
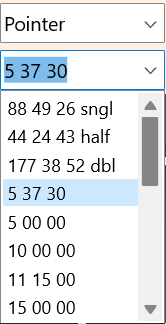
When you select either Pointer, Solar Arc, Ring 1 or Ring 2, the lower window drop down displays the same material: The Solar Arc - single, double and one half, various Dial motion intervals from 5°37’30”, 5°, 10°, 11°15’, 15°, 22° 30’, 30°, 45°, 90°, 1°, 1’, 5’ – then by Planet (and factor), and House. These are for moving the Dial Pointer at specific intervals within the confines of each overall selection like Ring 1 or Solar Arc. The Dial Pointer reacts to each press of the Up and Down arrows and moves the Dial Pointer as well as the Solar Arc selections. Ring 1 and Ring 2 will move each selected Ring while the Dial is static for the purposes of Dual-Disk analysis.
 |
 |
Shown in the same window, side by side, with different settings in the Dial Pointer Movement selection. When Pointer, Solar Arc, Ring 1 or Ring 2 are selected the drop-down window on the left is displayed. The Dial Pointer or the selected Ring will move at the selected rate each time you click the Up (forward in space) or Down (backward in space). In this illustration, the rate is 5°37’30” motion per Up or Down click.
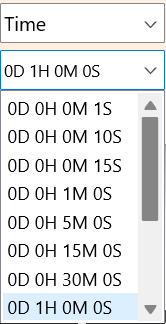
When Time is selected another menu appears in the lower drop-down and goes from 1” of time to 365 days. This function is used to control movements in the single chart itself (for example when one is rectifying the chart) and will advance (or regress) the chart conditions by the specified time interval. When Dynamics are selected like Transits, Progressions or Directions, the ring that contains the Dynamic material, whether the Single Wheel or a Ring will move at the selected rate with each click of the Up or Down buttons. In this illustration, the selected dynamic motion is 1 hour and the chart dynamics will advance with the Up arrow and go backward in time with the Down arrow. Note that these drop-downs are only partially listed. Look at them fully within the program.
When you select Time for the Dial Pointer Movement, the chart will move in time and adjust with each click of the Up or Down arrow buttons. This is quite useful for rectification. When timing things using the Dynamic settings like Transits, Directions or Progressions, this drop-down setting will control how far forward or backward in time the dynamics move against the original chart.
The Buttons on the lower Left side of the Display Window
Solar Fire X by Astrolabe Inc Copyright © All rights reserved.